Prepare the barbecue for direct and indirect cooking over medium heat (190°C-230°C).
Place the sausages into a large disposable drip pan. Pour the beer over the sausages.
Once the barbecue has preheated, place the tray of sausages onto the cooking grill over direct heat. Leave the sausages for 15 minutes for the liquid to come to a braising simmer. After 15 minutes, using heat proof gloves remove the pan from the barbecue.
While the sausages are cooking, mix together the two types of grated cheese. Make the honey mustard and chilli honey sauce, mix together their ingredients in two separate bowls.
One by one, remove the sausages from the tray and place onto the cooking grill directly over the heat and grill for 3 minutes, turning once, halfway through the cooking time or until the sausages have golden grill marks and are cooked through.
Slice the top of the hotdog buns, but don’t cut all the way through. Sprinkle some grated cheese into each bun. Drizzle a spoonful of the desired sauce into the roll, top with a sausage then finish with an extra sprinkle of cheese and sauce.
Place the assembled hot dogs onto the barbecue, in the indirect cooking zone. Leave them to cook for 5 minutes over indirect medium heat or until the cheese has melted and the bun has toasted to your liking.
Serve immediately and enjoy with an ice cold VB Beer and good mates.
Prepare the barbecue for indirect cooking over medium heat (190°C-230°C).
Combine all the dry rub ingredients together. Crack open the beer and pour half into a container to save for another use (or to cheekily drink). Using a can opener, carefully remove the top of the can. To prepare the chicken, remove any large clumps of fat from the cavity and fold the wings back behind the chicken. Lightly coat the chicken all over with olive oil and season with the dry rub. Place the cavity of the chicken over the can, pushing the chicken down as far as it will go so it sits sturdy.
Once the barbecue has preheated, place the beer can chicken onto the cooking grill. Ensure that the can/chicken is sitting sturdy on the grill. Roast the chicken over indirect medium heat, with the lid closed, for 1 hour and 20 minutes or until cooked through. To test the doneness, insert a thermometer deep into the breast, not touching any bones. The chicken must register 71°C or higher.
Once the chicken has cooked, remove it from the cooking grill with heatproof gloves and a large spatula. Leave the chicken to rest for at least 10 minutes, the internal temperature will continue to rise 3 to 6°C in this time, reaching the safe doneness temperature for chicken
Carefully remove the can from the chicken, carve and serve.
Prepare the barbecue for direct cooking over low heat (close to 150°C)
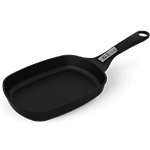
Once the barbecue has preheated, add the chocolate dipping sauce ingredients to a large Q ware frying pan or small Weber round frying pan. Place the pan onto the cooking grill and cook the sauce over direct low heat, with the lid closed, for 5 minutes, or until just bubbling. You will need to stir the sauce every minute or so with a silicone whisk. Remove from the heat, pour the sauce into a serving dish.
Using a breadknife, slice the donuts in half. Grill the donut halves on the cooking grill, cut side down, over direct Low heat, with the lid closed, for 60 seconds, or until golden grill marks appear. Rotate (don’t flip) the donuts 90° and cook for another 60 seconds. Flip the donut halves, place 3 to 4 marshmallows on top of a half of the toasted donuts, then cook for 60 seconds. Finally rotate the donuts 90° and cook for final 60 seconds or until the donut is golden all over and the marshmallow has started to melt.
To assemble, place slices of strawberry on a toasted donut half without the marshmallow, flip the other half (with marshmallow) onto the strawberries to create a sandwich. Repeat with the remaining donuts.
Serve the donuts with the chocolate dipping sauce and enjoy!
In a bowl combine all the patty ingredients (see tip 1). Divide the mix into 4 portions
Roll each portion into a ball and then flatten with the palm of your hands, so they are about 2 cm thick. Using your thumb, make an indentation in the centre of the patty. This helps to keep the patties a consistent thickness when cooking
Prepare the barbecue for direct cooking over medium-high heat (210°C-250°C).
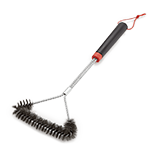
Brush the cooking grills clean with a wire brush. Grill the patties over direct medium-high heat, with the lid closed, for 3 to 4 minutes per side, or until cooked to your liking. Once there is one minute left of the cook time, place a slice of cheese over each patty to melt. Toast the buns, for 1 minute per side.
Build the burgers buns with a patty, tomato, pickles, lettuce and sauce.
Prepare the barbecue for direct cooking over medium-high heat (210°C-250°C) with a large Weber Ware frying pan.
Prepare your barbecue for direct cooking over medium-high heat (210°C-250°C) with a large Weber Ware frying pan. If you are using a Weber Pulse, preheat your barbecue with the lid closed and your control knob(s) on high for 15 to 20 minutes, or until the barbecue reaches 290°C.
Lightly coat the fillets with olive oil, salt and pepper. Cut the lemon in half.
Once the barbecue and frying pan has preheated, add the whiting fillets to the pan, skin side down. Cook the fillets over direct medium-high heat, with the lid closed, for 2 minutes, until the skin is lightly coloured golden and the flesh is just cooked through, there is no need to flip the fillets. While the fish is cooking, grill the lemon halves, cut side down for 2 minutes, or until caramelised
Squeeze the caramelised lemon over the fillets and serve immediately.
Prepare the barbecue for direct cooking over high heat (250°C-290°C).
Lightly coat the steak with olive oil and season with salt and pepper all over.
Once the barbecue has preheated, brush the cooking grills clean with a wire brush. Place the steak onto the cooking grill, using the back of your tongs, gently press on the steak to ensure good contact with the hot grill. Grill the steak over direct high heat, with the lid closed, for 2 to 5 minutes per side (see tips for steak timing guide) or until done to your liking.
Once the steak has cooked, remove it from the barbecue and leave to rest for 5 minutes. Slice the steak across the grain and serve immediately.
Rare (49°C): 2 minutes per side
Medium Rare (54°C): 3 minutes per side
Medium (60°C): 4 minutes per side
Medium Well to Well done (66°C- 68°C): 5 minutes per side
Note: Always keep in mind that the internal temperature of the steak will continue to rise 3 to 6°C while it’s resting.
Prepare the barbecue for direct cooking over medium-high heat (210°C-250°C).
Lightly coat the backstraps with 2 teaspoons of olive oil and 6 teaspoons of Weber Greek Seasoning. Assemble the onion ring skewers. Lightly coat the onion skewers with the remaining 4 teaspoons of olive oil and 2 ½ teaspoons of Weber Greek Seasoning.
Once the barbecue has preheated, brush the cooking grills clean with a wire brush. Grill the lamb backstraps over direct medium-high heat, with the lid closed, for 2 minutes per side. As lamb backstrap is best served medium rare to medium, cook until it reaches an internal temperature of 50C, then remove from the barbecue and leave it to rest for 5 minutes before slicing. While the lamb is cooking, grill the red onion skewers for 5 minutes per side, turning as needed.
While the lamb is resting, grill the flatbreads over direct medium-high heat, for 1 minute per side or until just toasted. Remove the red onion from the skewers, and roughly chop if desired.
Slice the lamb against the grain. Spread the beetroot dip inside the wrap, top with lettuce, sliced lamb, red onion and feta. Wrap up and enjoy.
Rare: 49°C
Medium Rare: 54°C
Medium: 60°C
Medium Well: 66°C
Well Done: 68°C
Prepare the barbecue for direct cooking over medium heat (180°C-230°C).
Lightly coat the chicken all over with the olive oil and Weber Seasoning.
Once the barbecue has preheated, brush the cooking grills clean with a wire brush. Place the chicken onto the cooking grill, cavity side down (see tip 2). Grill the chicken over direct medium heat, with the lid closed for 40 minutes.
Once the chicken has cooked for 40 minutes, using a spatula and tongs, flip the chicken over, and continue to cook, skin side down for a further 15 minutes or until the chicken is cooked through. To check doneness, insert an instant read thermometer into the thickest part of the breast (not touching bone), ensure that it registers 71°C. Remove the chicken from the barbecue and let rest for 10 to 15 minutes, where the temperature of the chicken will continue to rise to 74°C (the safe doneness temperature for poultry).
Once the chicken has rested and reached the safe doneness temperature you can carve the chicken and serve.
A quick and efficient method to cooking a whole chicken is to butterfly it. Firstly, remove any excess fat, typically just inside the cavity. Turn the chicken over so it is breast side down. Face the chicken with the tail end closest to you. Using sharp kitchen scissors or poultry sheers, cut along both sides of the back-bone, remove and discard it. Turn the chicken back over, skin side up, and press down on the breastbone to flatten. If not already done, tuck the wing tips behind, under the chicken.
It is important to cook the chicken with the cavity flat on the cooking grill as the bones will protect the meat when cooking over direct heat for the long period.
Lay the pork out flat, flesh side up. Sprinkle Weber Greek Seasoning on the flesh side of the pork belly. To prepare the porchetta, view our grill skill on how to prepare, score and truss a porchetta.
Ensure your barbecue is clean and free from any grease or debris. Prepare the barbecue for indirect cooking over high heat (220°C-260°C).
Lightly coat the outside of the porchetta with olive oil and season all over the outside with sea salt.
Once the barbecue has preheated, roast the pork over indirect high heat, with the lid closed, for 25 to 30 minutes or until the skin is crackled (avoid lifting the lid too much).
Once the skin has crackled, reduce the temperature of the barbecue down to indirect medium heat (roast setting-190° to 230°C). Continue to roast the pork at indirect medium heat for the remaining cooking time, or until the internal temperature reaches 60°C for a medium result (approximately 60 to 90 minutes longer). The internal temperature will continue to rise 3°C to 6°C while it’s resting (final doneness temperature for Pork is 63°C for medium, 68°C for medium well).
Once the pork has cooked, leave to rest for 15 minutes before carving.
Tips for Buying: It is best to buy a piece of skin-on pork loin with the belly attached from the butcher. Avoid buying vacuum sealed pork, which has been packed in plastic, as it is much harder to crackle.
Scoring a pre-rolled (trussed) roast: If the butcher hasn’t already scored the skin; Score the skin at 1cm intervals around the roast, being careful not to cut the twine.
Scoring a piece of pork loin and belly (not yet rolled/trussed): If the butcher hasn’t already scored the skin; score the skin at 1cm intervals along the length of the roast. If needed, remove a section of the rind from above the loin meat. This is done because if you roll the belly around the loin and there is rind wrapped up inside the roast, this will be rubbery when you serve it.
Trussing: tightly roll the roast, and truss with butcher’s twine.
If the pork has cooked but the rind hasn’t crackled, remove the rind and return the rind to the barbecue and roast over indirect medium heat (190°C to 230°C) for 15 minutes to crackle whilst the pork roast is resting.
Prepare the barbecue for indirect cooking over medium heat (roast setting-200°C-230°C).
Spray a 25cm diameter springform cake tin with a little cooking oil spray or melted butter. Line the tin with baking paper, ensure that the height of the paper is not greater than 1cm over the top of the tin. Use a food processor or place the biscuits into a large zip lock bag and crush the biscuits into crumbs. Pour the biscuit crumbs into a bowl, add the zest from a lemon and the melted butter. Mix until well combined. Pour into the lined cake tin and press to compact the base.
In the bowl of a stand mixer or using electric beaters, beat the cream cheese and caster sugar for 4 minutes on medium speed, or until light and fluffy. Gradually add the Biscoff spread and keep mixing to combine. Slowly pour the lightly beaten eggs into the cream cheese mix, ensuring that it is well incorporated before continuing to add more egg. Once just combined, avoid beating the mixture much more. Slowly add the cream and finally the salt. Once the ingredients are smooth and combined stop beating and pour the mix into the cake pan.
Once the barbecue has preheated, bake the cheesecake over indirect medium heat, with the lid closed, for 30 to 45 minutes, or until the mix is just set and the top has coloured. Once finished cooking (if possible) turn the barbecue off and leave the cheesecake to cool in the barbecue for 30 minutes (to prevent cracking from temperature shock).
Leave the cheesecake to cool completely before serving. Once cooled, refrigerate to store the cheesecake. Best to bring to room temperature when you are ready to serve.
Have your cream cheese, eggs and thickened cream at room temperature, it will result in a silky cheesecake mix with no lumps.
Once the egg has been added to the cheesecake mix, avoid beating much further. If you overbeat the eggs in the mixture, it can cause the cheesecake to split.
If you are making the cheesecake for the following day, add 1 tablespoon of sifted plain flour to the cheesecake mix to avoid weeping when refrigerated.
Don’t miss out! Be the first to know about the latest news and promotions.